In this tutorial we will learn how to use some of the very basic features of Visual Studio and create a UWP(Universal Windows Platform) application. Windows 10 introduces the Universal Windows Platform (UWP), which further evolves the Windows Runtime model and brings it into the Windows 10 unified core. As part of the core, the UWP now provides a common app platform available on every device that runs Windows 10. By the end of this tutorial you will have basic knowledge about how to create a simple UWP application and how to drag and drop objects in order to make UI and also how to edit their internal code.
Firstly we'll start with simply opening with the Visual Studio 2015. On the left side you will be able to see following options.

From this menu you need to click on the "New Project.." option. A dialog box will be shown and then you will choose C# and extend the tree then you will select Universal. From the Universal option, you will select "Blank App (Universal Windows)".


Firstly we'll start with simply opening with the Visual Studio 2015. On the left side you will be able to see following options.


After that you will have the following screen
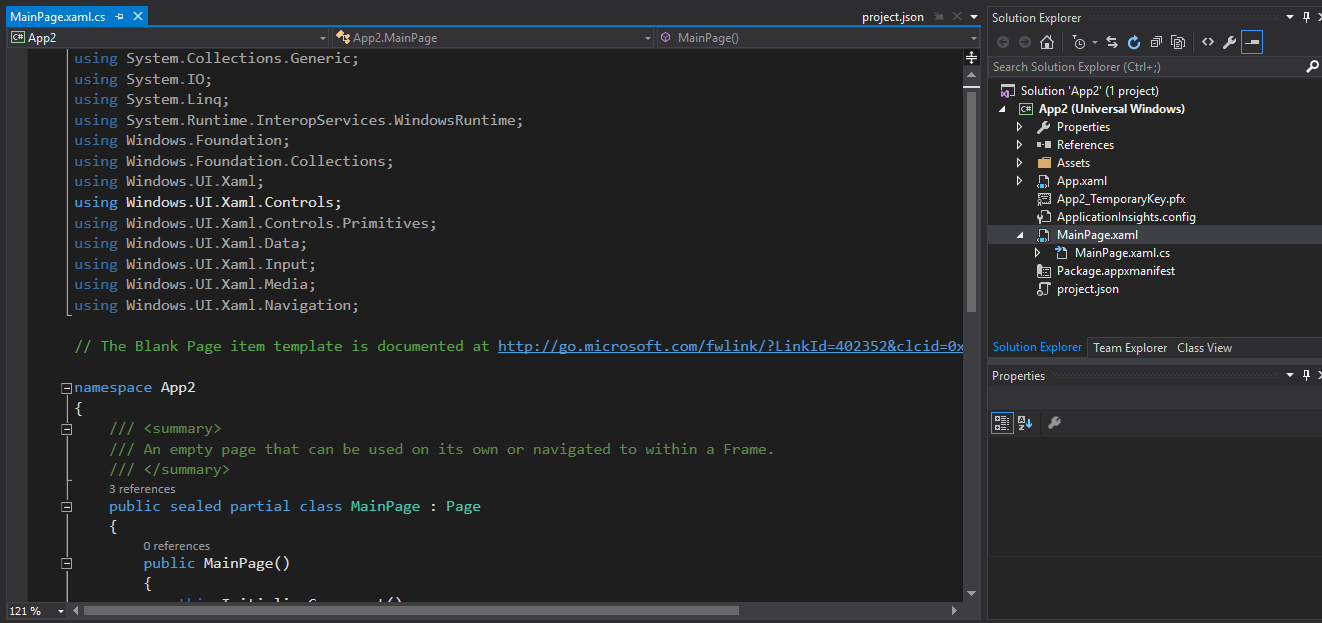
From the window "Solution Explorer" you need to double click on the "MainPage.xaml". This will open the designer view for you. like this.

On your left you can see some options in the column like Server Explorer, Toolbox, Data Sources etc. From there if you select "Toolbox" option. In the toolbox option you will have the drag n drop objects which you can drag to your UI and create a simple calculator.

From there we can drag a TextBox and drag few buttons in order to create our calculator design. Apart now for the getting starting purposes, it is ok to use drag and drop but a good programming technique is that you add things with the your on code in your own styling and logic. This will make your application more efficient and also there would be less lines to compile resulting in good speed.
So now let us go deeper into the code. The easiest way to learn about the code is when you will add a Textbox, you will see a new line adding in you .xaml starting with the HTML alike tag <Textbox. Now there you can see that how the Textbox was coded when you dragged the object. So now you can also see and practice yourself with different objects. If you have any kind of previous knowledge on HTML or CSS, that will help you greatly in order to define behavior of objects. Let us see some of the codes on how to make a Button or Textbox.
To create a Textbox, add this to .xaml: <TextBox Name="Screen1" Text="Enter Numbers Here.." />. By doing this you are now creating a Texbox with name Screen1 and with content Enter Numbers Here in it.
To create a Button, add this to .xaml: <Button Name="but1" Content="Button one"> </Button>. By doing this you are now creating a Button with name but1 and with content Button one in it.
Now for the calculator, in this tutorial I have chosen a grid view, split it in two rows. Add a Textbox to the first row and buttons in the second row. In order to add buttons in second row, we will be needing another 4x4 grid and then we will be adding buttons. Lets see the code now.
For grid view, add this to .xaml: <Grid> "Code" <Grid>. We add all the other .xaml code in the "Code" area.
To add a row, add this to .xaml: <Grid.RowDefinitions>
<RowDefinition ></RowDefinition>
</Grid.RowDefinitions>
This will add a new row in your grid. If you want to add more rows, just add <RowDefinition ></RowDefinition> in <Grid.RowDefinations>.
To add a column, add this to .xaml: <Grid.ColumnDefinitions>
<ColumnDefinition></ColumnDefinition>
<Grid.ColumnDefinitions>
Do the same for adding a column.
Now all you need is to make a logic and add this all up and make a pretty calculator UI. If there are any queries I'm pasting the complete code so you can take help from it. If still have any kinda query, feel free to comment!
<Grid MaxHeight="1000" MinHeight="500" Background="{ThemeResource ApplicationPageBackgroundThemeBrush}">
<Grid>
<Grid.RowDefinitions>
<RowDefinition Height="250"></RowDefinition>
<RowDefinition></RowDefinition>
</Grid.RowDefinitions>
<TextBox Grid.Row="0" Name="Screen1" Text="Enter Numbers Here.." Height="150" Width="300" Margin="22"/>
<Grid Grid.Row="1" Margin="10" HorizontalAlignment="Center" >
<Grid.ColumnDefinitions>
<ColumnDefinition></ColumnDefinition>
<ColumnDefinition></ColumnDefinition>
<ColumnDefinition></ColumnDefinition>
<ColumnDefinition></ColumnDefinition>
</Grid.ColumnDefinitions>
<Grid.RowDefinitions>
<RowDefinition></RowDefinition>
<RowDefinition></RowDefinition>
<RowDefinition></RowDefinition>
<RowDefinition></RowDefinition>
</Grid.RowDefinitions>
<Button Name="but1" Grid.Row="0" Grid.Column="0" Margin="10" Height="70" Width="70" Content="1"></Button>
<Button Name="but2" Grid.Row="0" Grid.Column="1" Margin="10" Height="70" Width="70" Content="2"></Button>
<Button Name="but3" Grid.Row="0" Grid.Column="2" Margin="10" Height="70" Width="70" Content="3"></Button>
<Button Name="but4" Grid.Row="0" Grid.Column="3" Margin="10" Height="70" Width="70" Content="/"></Button>
<Button Name="but5" Grid.Row="1" Grid.Column="0" Margin="10" Height="70" Width="70" Content="4"></Button>
<Button Name="but6" Grid.Row="1" Grid.Column="1" Margin="10" Height="70" Width="70" Content="5"></Button>
<Button Name="but7" Grid.Row="1" Grid.Column="2" Margin="10" Height="70" Width="70" Content="6"></Button>
<Button Name="but8" Grid.Row="1" Grid.Column="3" Margin="10" Height="70" Width="70" Content="*"></Button>
<Button Name="but9" Grid.Row="2" Grid.Column="0" Margin="10" Height="70" Width="70" Content="7"></Button>
<Button Name="but10" Grid.Row="2" Grid.Column="1" Margin="10" Height="70" Width="70" Content="8"></Button>
<Button Name="but11" Grid.Row="2" Grid.Column="2" Margin="10" Height="70" Width="70" Content="9"></Button>
<Button Name="but12" Grid.Row="2" Grid.Column="3" Margin="10" Height="70" Width="70" Content="-"></Button>
<Button Name="but13" Grid.Row="3" Grid.Column="0" Margin="10" Height="70" Width="70" Content="0"></Button>
<Button Name="but14" Grid.Row="3" Grid.Column="1" Margin="10" Height="70" Width="70" Content="."></Button>
<Button Name="but15" Grid.Row="3" Grid.Column="2" Margin="10" Height="70" Width="70" Content="="></Button>
<Button Name="but16" Grid.Row="3" Grid.Column="3" Margin="10" Height="70" Width="70" Content="+"></Button>
</Grid>
</Grid>
</Grid>
https://uwptutorials.com/
ReplyDelete